My writing/blogging Environment
On my Mac, I’ve been slowly making improvements to my writing environment, both physical and software. It was not intended initially, but this is sort of “part 2” of the post I wrote about my Mac’s menu bar. There are five overall components, and I’ll try to summarize each below.
Emacs
I’ve been using Emacs since 2018, with a journal entry titled “does this work?” which is very appropriate when you finish installing Emacs for the first time.
In terms of writing for my blog, as I do with this post you’re reading now, I rely on Emacs to convert my post to Markdown (and HTML where Markdown falls short, like in the case of footnotes I sometimes use) and basic spell checking among many other writing “hacks” that are usually achieved by other independent Mac apps. A few quick examples: typing out shortcuts like “mb” will automatically expand to “Micro.blog” or Ctrl t, which in Emacs runs the command transpose-chars, to fix one of the most common typos (from “tyop” to “typo”), among other full automations and scripts I won’t get into here. Emacs has won me over time and time again when I compare it to other writing applications; in my mind, It’s the best writing and note-keeping tool ever created.
Micro.blog (app)
Last Friday I said I was finally satisfied with Micro.blog macOS app. Since my blog is hosted on Micro.blog, it only makes sense to use the official app, but I tried to use it several times in the past and ended up uninstalling it because it did not work as smoothly for me as the Micro.blog’s web interface. Now it seems it’s finally better.
The app handles Grammarly (coming up below) better than the web interface. “Scheduling” a post from the past runs better than it does on the web interface too. And while drafts are still not saved automatically (something I’ve asked for many times), I can at least save them quickly with ⌘ s, and the app is safer than a browser tab you’re likely to close by mistake and lose your work. The macOS app also asks you if you want to save your post when you’re about to close it.
The app also has a built-in preview option that shows you what your markdown post looks like. It gets updated as you type, which is a nice touch. Another thing worth mentioning: the app can also be used to reply to comments, I now use it whenever I get notifications on my iPhone (which are mirrored on my Mac’s screen) to reply quickly by clicking on “Mentions.”
A few things are still missing, and I hope these will be corrected in the future. The upload page only copies the AI description for images when you click on a particular image on the website and click on “Copy HTML” from there, which is cumbersome; I believe copying the HTML code with the AI-created caption should be the default1. As if @Manton read my mind, the latest update of the Micro.blog has a dedicated “copy HTML” from images in the app, with the AI description included.
Grammarly
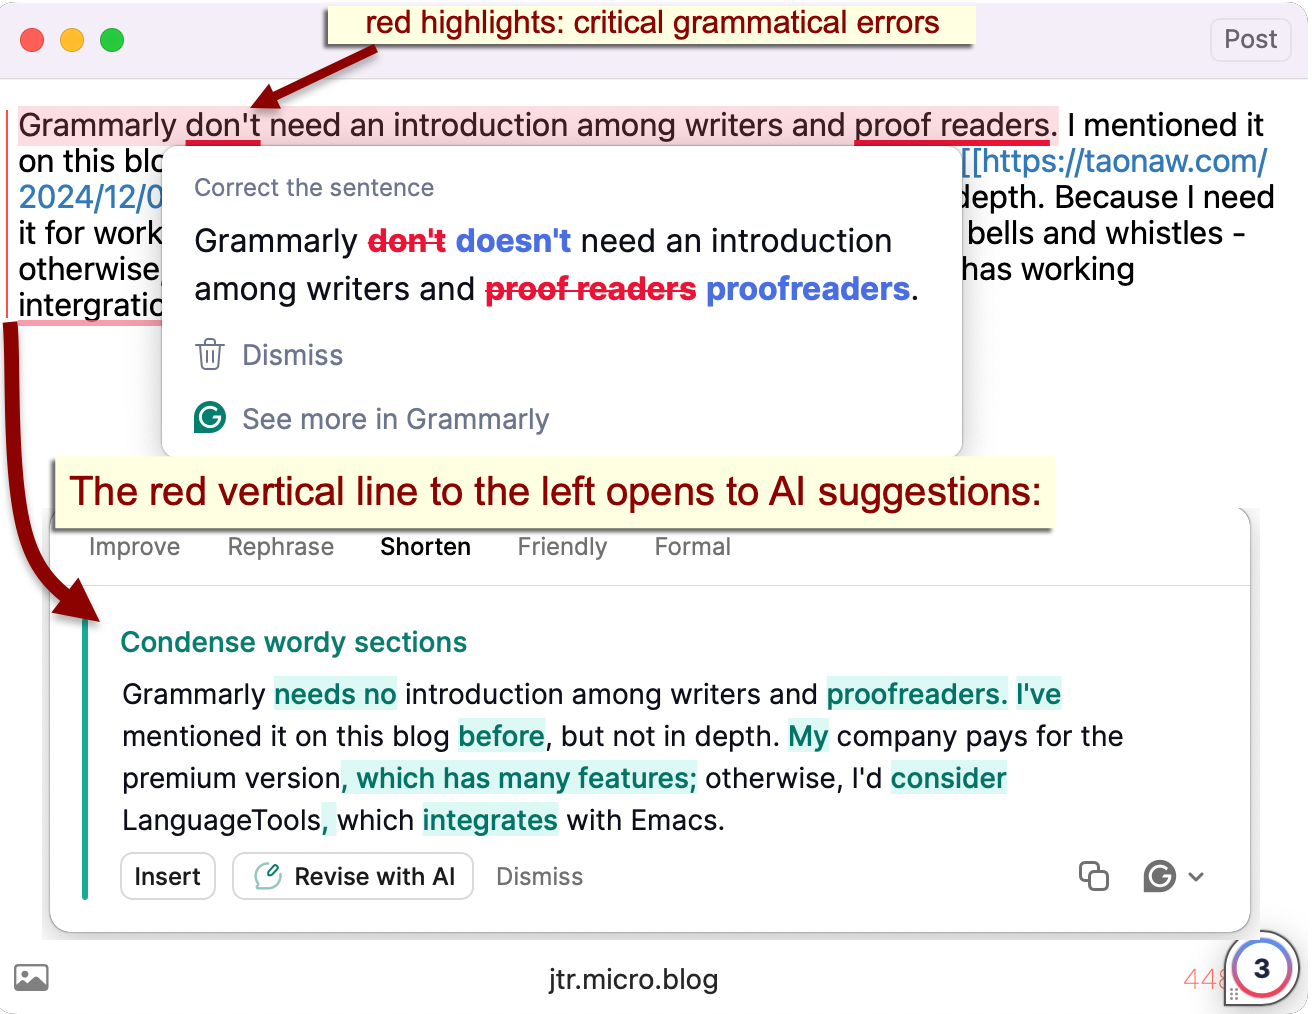
Grammarly doesn’t need an introduction among writers and proofreaders. I mentioned it on this blog several times, most recently when discussing my Mac’s menu items, but not in depth. I’ve tested several AI grammar tools, and Grammarly is hard to beat.
Grammarly’s markings on texts with its newly integrated AI summaries options augment my writing in a way that “all or nothing” tools like Apple Intelligence or Chat GPT can’t do. It’s a premium tool that isn’t cheap, though.

PopClip
I talked about PopClip, so I won’t expand much here. It is more of a reading tool than a writing one, but in terms of the latter, PopClip has Urban Dictionary available with a click if I’m not sure about a slang term. There’s also the macOS dictionary (Emacs has a built-in dictionary). PopClip is an amazing tool that doesn’t cost too much and is worth every cent if you ask me.
Standing Desk
I got my Standing Desk in 2020. It’s more of a writing enhancement than a tool, and in my case, it’s what allows me to be productive and keep writing instead of getting too antsy. I enjoy typing standing in the early morning with my coffee; this is usually when the best writing takes place.
At first glance, a manual elevated desk like mine doesn’t seem like much, but if you read the post linked above, you’ll see I’ve put quite a bit of research into it. The fact that it doesn’t raise on a hinge, the way it supports my ultra-wide screen, and the size of the keyboard tray that fits exactly at the top of my desk without blocking my drawers—all of these things took patience and time.
Footnotes
1 : I understand, though disagree, with folks who want nothing to do with AI on their blog. It’s good that Micro.blog offers one central place to turn all AI features off. I believe that some functions, however, like having alt descriptions for images created for photos by default, is one of the good use cases for AI. You can always change the description if you’d like, after all.
