
Mastodon guys podcast idea
I don’t want my only “real” blog post to be about being sick, so here’s another quick update.
Feeling like myself today again, and besides the stuffy nose, things are good. The sun is out again, and I think it’s time to go out for a walk with my camera and enjoy the fresh air.
Yesterday I chatted with George and Adam about random technology things. It was fun in a way I was hoping it would: just three guys randomly chatting about a bunch of geeky topics. Of course, George and I tried to get Adam to see the light and join the #Emacs church, but all in due time. I’m sure Adam will come to the glory and light eventually.
The idea was to record and make this into a podcast. This seems like it could take off: we have the content, the schedule, and the tools. We just need to iron out a few things (like, where do we host the podcast itself? What good platform exists?) The coincidence that Micro.blog offers podcasting hosting didn’t escape me. I’ll look more into that.
Playing around with Micro.blog. More like trying to wrap my head around its mastodon relationship.
This service is "smart" enough to know to convert long posts to blog entries, while providing a quick link on Mastodon. Short posts will show fully on Mastodon (and in the Micro.blog's direct feed of the community).
It's interesting how it works, sort of a mix of Mastodon and a blog in one. I think I like.
First Post on Micro.blog
I’m testing Micro.blog to use for quick blog-like updates. If you’re reading this on Mastodon, it means cross-posting is enabled correctly from Micro.blog to Mastodon.
This post is written in Emacs org-mode, which I will convert to Markdown, then copy-paste to Micro.blog. The website (blog) I opened with this service is jtr.micro.blog. It was very easy to find and install a theme I like. Ironically enough, Micro.blog is using Hugo, which is what I’m trying to replace.
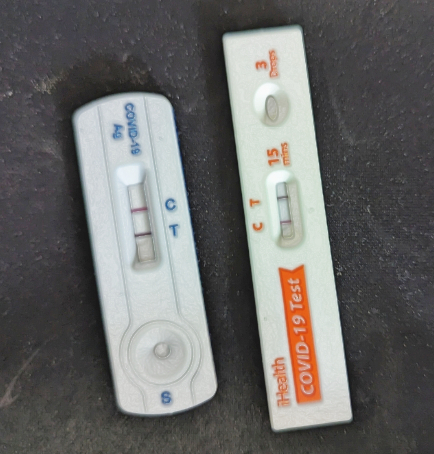
Please forgive typos, I’m recovering from COVID and my brain is floating on different cold medicines.
This is another test post, to see what posts here do with my existing mastodon account which I created for feeds. https://fosstodon.org/@jtr_feed
The problem with Signal
No, I don’t mean the new “hack” from Cellebrite, which still seems to make waves1. There’s a more fundamental issue at hand, a result of Signal being secure, not because it’s flawed somehow.
Privacy as Ownership
I’ve been thinking about privacy for a while, if that’s not evident from my recent blog posts. The word is so widely used these days it lost tangible meaning. What does privacy even mean anymore?
To me, privacy is the option to share information. To have a choice. This post I’m writing right now, for example. I can keep it to myself, deep in my journal pages, where it will never be shared. Or I can push it to my repository on GitLab, which will cause Netlify to pull it and build a post on its virtual Hugo environment, with DNS pointing to my domain, for the whole world to see.
In order to have this choice, I first need to own my data. In the old days, I used to have a blog on WordPress.com. There was no local copy; I’d just log into the website, work on my draft, and publish. I never truly owned my data, despite whatever WordPress might say. They could have shut down my account without a second thought, and all of my posts would have been gone forever, no matter how loud I’d yelled. No data ownership, no choice, no privacy2.
Can I Own my Data on Signal…?
At this point, you can see what I’m getting at: with Signal, I don’t own my data. Sure, my conversations are end-to-end encrypted. Sure, no one besides me and the person I’m talking to, not even Signal, can read these conversations. But the WordPress problem I described above still exists: I don’t own the conversation.
Even though the conversation itself is stored locally in a database on my phone, it is fully encrypted (as it should be), and even if I decrypt it (in a similar manner Cellebrite did3, it is still not laid out conveniently. It looks like lines in a table. After all, it’s a database you’re looking at.
As far as I know, Signal doesn’t have the option to export conversations4. To do so would be a security risk for sure, especially for non-informed users who just want to have an encrypted chat client on their phone. However, I believe there’s room for such a feature, perhaps with limited access. Maybe for developers or folks who want to build Signal from source, which I think is still possible (Signal has their repository on Github).
Footnotes
1 If you’re curious if there’s truth in these claims, start by reading Signal’s official response and follow up on Reddit for a few entertaining remarks.
2 You could argue that having my post hosted on GitLab is not much different than WordPress, and you’d be right, with one important exception: all my posts are local before they ever get pushed to GitLab. GitLab, and the post you’re now reading, are just a copy of my original content, which I do my best to preserve with encrypted backups. If GitLab closes my account tomorrow, I won’t lose anything. I could probably relocate to a new repository within the same day.
3 The retracted blog post on their site showed how they decrypted the local database on an Android device. In a way, it was pretty informative. The big problem with it was that it was no hack at all: they described a way to decrypt the information using an unlocked phone. The equivalent of breaking into a house after you have already unlocked the front door with the key you happen to have.
4 There’s an option to creak a local encrypted backup, but this backup is meant to be used with Signal. If you don’t have Signal, you can’t use this option.
I was listening to some Brahms music and I was thinking I should find myself some more, but I forgot how hard it is to get a proper classical music CD.
Searching is always difficult, and then my NYPL card doesn’t work anymore. When I do find a CD, I need to pick it up from the library and record the tracks to mp3 of flac files.
Why not just listen to streaming music? Because it seems every musician and his grandma create some Brahms cover (this is much worse of course for Beethoven, or Mozart) and you end up listening to some electrical guitar mix with drums that some 20-year-old thought was cool.
Comment from 2024-12-12: Since then, I’ve learned and subscribed to Idagio, an online lossless streaming service that keeps my classical music cravings satisfied
Schedule Post… My first “Tex-Mex” (totally isn’t, thankfully) is breakfast. It was pretty good: scrambled egg (a single one, thank you very much), a few tomatoes, spinach cut on top, a strip of sriracha at the bottom, and zaatar on the whole thing. Love it 📷:
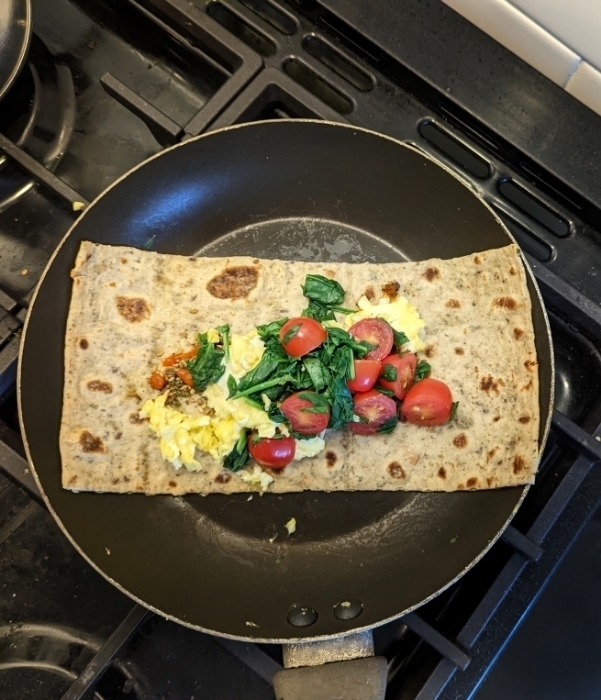
Making it was a bit cumbersome because I prepped the egg first, then I had to watch the pan. Then I warmed up the spinach and tomatoes, and finally, I put everything in the wrap and put it on it to warm up. I think there’s a better way to do this; it feels like I did it backward.
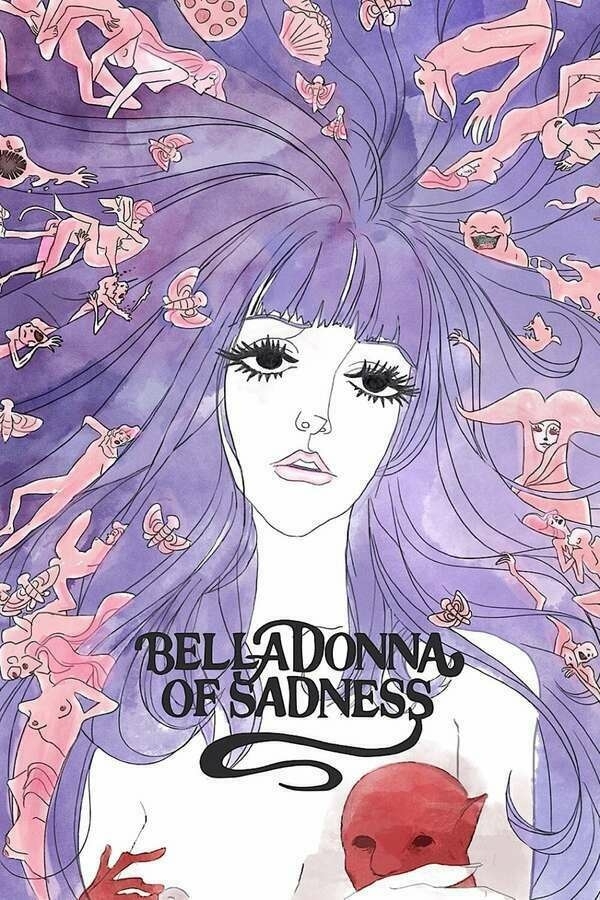
Belladonna of Sadness, 1973 - ★★★ (contains spoilers)

This review may contain spoilers.
This movie is not fully animated. At least not in the traditional sense. Most of the motion in the movie consists of the camera panning over long strips of paper showing the progression of the story from right to left. This is not to say there is a complete lack of animation. There's enough of that, and though basic, it fits in its elementary - and at times primal - methodology. You'll need to watch this one with an open mind and a healthy dose of patience.
This mechanism is important to how the movie delivers the story. It allows a gradual change in the tone and mood of what's going on. In a certain scene, for example, a crowd of people seems content, but as the scene goes on, the faces shift, the colors darken, and an angry mob emerges. This kind of transition is often reinforced with sounds and colors, another important element of storytelling. The red of passion and violence (of which there is a lot), the pink of beauty, the green-yellow of evil and sickness, and even the black of nothingness for a pause.
I mentioned passion and violence. This movie swims in those. Nudity is not hidden nor implied. drawings of breasts, vulvas, and penes dance on the screen while orgies of all genders and even a couple of animals blend into violent rivers or red. The cliche elements are here: sex is evil (the devil is shaped like a large penis); pleasure is sin; women corrupt. It's all there and might rub certain folks the wrong way. This is also a good point to mention that rape is a part of this movie. If this is a hard line for you in movie watching, I'd sit this one out.
But this movie doesn't dwell on cliches, and just as I was about to roll my eyes, the movie ask something I didn't see coming.
"Who says anger and hatred are ugly," the devil asks Jeanne after she sold her soul to him. The scene is painted with colorful butterflies, while soft bells chime in the background. Jeane lays naked after, having an orgasm of a lifetime. Can such a thing be fundamentally evil? And if not, are we evil for teaching it is? It's an uncomfortable question to ask, and I was happy to see that not only the film didn't shy away from it, but chose it as a focal point. There is no peace without war, and there's no haven without hell.
The movie draws a direct connection to women in the French Revolution, not too long after they were considered to be witches. The fear of men of women is everywhere in this film. There's a woman who wants to have sex with her husband more often but knows contraception is against god. they are too poor to afford to have more kids. She decides to use contraceptives anyway (a gift from Jeanne, who is called a witch at this point) and finds happiness not just for her husband but for herself.
It's not a coincidence that at the end, when the "witch" Jeanne is burned at the stake, it's not a stake at all: it's a cross. She suffered continuously by the hand of the people she worked hard to serve and help with the aid of the devil. These were the same folks who stood silent while she was burned alive.
An interesting question is not "was this woman evil," but the underlying one: is the devil, who helped the woman and through the abilities, he gave her helped the people, evil, or is it god, who's teachings caused such an artifact of beauty good will be destroyed? Are we born into sin, or are the teachings of the priests the ones who turn us into monsters?
There was nothing evil about Jeanne: not at the beginning of the movie and not at the end. Even when she thirsts for revenge and goes after the people, perhaps blamed for the Black Death in the film, one has to recall the nightmare she spent her waking life living. Why wouldn't she want revenge? Wouldn't we? Don't we?
Belladonna of Sadness, 1973 - ★★★ (contains spoilers)
This review may contain spoilers.
This movie is not fully animated. At least not in the traditional sense. Most of the motion in the movie consists of the camera panning over long strips of paper showing the progression of the story from right to left. This is not to say there is a complete lack of animation. There's enough of that, and though basic, it fits in its elementary - and at times primal - methodology. You'll need to watch this one with an open mind and a healthy dose of patience.
This mechanism is important to how the movie delivers the story. It allows a gradual change in the tone and mood of what's going on. In a certain scene, for example, a crowd of people seems content, but as the scene goes on, the faces shift, the colors darken, and an angry mob emerges. This kind of transition is often reinforced with sounds and colors, another important element of storytelling. The red of passion and violence (of which there is a lot), the pink of beauty, the green-yellow of evil and sickness, and even the black of nothingness for a pause.
I mentioned passion and violence. This movie swims in those. Nudity is not hidden nor implied. drawings of breasts, vulvas, and penes dance on the screen while orgies of all genders and even a couple of animals blend into violent rivers or red. The cliche elements are here: sex is evil (the devil is shaped like a large penis); pleasure is sin; women corrupt. It's all there and might rub certain folks the wrong way. This is also a good point to mention that rape is a part of this movie. If this is a hard line for you in movie watching, I'd sit this one out.
But this movie doesn't dwell on cliches, and just as I was about to roll my eyes, the movie ask something I didn't see coming.
"Who says anger and hatred are ugly," the devil asks Jeanne after she sold her soul to him. The scene is painted with colorful butterflies, while soft bells chime in the background. Jeane lays naked after, having an orgasm of a lifetime. Can such a thing be fundamentally evil? And if not, are we evil for teaching it is? It's an uncomfortable question to ask, and I was happy to see that not only the film didn't shy away from it, but chose it as a focal point. There is no peace without war, and there's no haven without hell.
The movie draws a direct connection to women in the French Revolution, not too long after they were considered to be witches. The fear of men of women is everywhere in this film. There's a woman who wants to have sex with her husband more often but knows contraception is against god. they are too poor to afford to have more kids. She decides to use contraceptives anyway (a gift from Jeanne, who is called a witch at this point) and finds happiness not just for her husband but for herself.
It's not a coincidence that at the end, when the "witch" Jeanne is burned at the stake, it's not a stake at all: it's a cross. She suffered continuously by the hand of the people she worked hard to serve and help with the aid of the devil. These were the same folks who stood silent while she was burned alive.
An interesting question is not "was this woman evil," but the underlying one: is the devil, who helped the woman and through the abilities, he gave her helped the people, evil, or is it god, who's teachings caused such an artifact of beauty good will be destroyed? Are we born into sin, or are the teachings of the priests the ones who turn us into monsters?
There was nothing evil about Jeanne: not at the beginning of the movie and not at the end. Even when she thirsts for revenge and goes after the people, perhaps blamed for the Black Death in the film, one has to recall the nightmare she spent her waking life living. Why wouldn't she want revenge? Wouldn't we? Don't we?